It won’t build itself back up.
You have to start somewhere. And so I did. I got started.
I also listed all the torque specs for my personal notes, but of course use whatever your manufacturer recommends.
Here’s the order in which I build up my bike:
| Step | Notes | Time (min) |
| Prep paint job | Easy. Lowe’s was able to paint it overnight for me using some Satin Red paint and primer. | n/a |
| Slide on seat post and secure collar | Easy. Do this to secure your bike in a bike stand. | 5 |
| Install rear shock | Easy. Just 2 bolts and done. | 5 |
| Run rear brake and dropper cable housing through frame | Moderate. Don’t cut it yet, but just run the housing through for now. Attach the banjo bolt and tighten to 4.4-5.4 Nm. It’s easier to get the dropper post done now while the bottom bracket is not installed. Visually check your work. If any of the o-rings protrude from the banjo fitting or banjo bolt, remove and replace the o-rings, then repeat the installation process. | 60 |
| Fork and Handlebar | Moderate. Install fork, headset cup and top bolt took a while to grease everything up. Use zip ties to help temporarily. Put handlebar so that you can then add on components like brake levers. This was easy since the stem was already on the bar. | 30 |
| Handlebar lever components and rear caliper | Easy. Attach all the various levers (1.1-1.3Nm) and the rear brake caliper to the frame and tighten caliper to 9.8-11.8Nm. You will probably need to come adjust the caliper later to line up with the brake pads. | 10 |
| Attach front caliper to fork | Easy. Attach the front brake caliper to the fork and tighten to 9.8-11.8Nm. You will probably need to come adjust the caliper later to line up with the brake pads. | 5 |
| SRAM CODE RSC hydraulic cable line install | Moderate. Additional steps at bottom of this page. I put brake notes in a separate table at the bottom of the page because it’s so lengthy. I wanted you to be able to see the remaining steps without being bogged down in the brakes if that’s not applicable to you. I did both front & rear brakes at this time. | 60 |
| SRAM CODE RSC bleed edge (caliper) bleed | Difficult. Additional steps at bottom of this page. I did the front brakes only. The rear was much easier because I was familiar with it after having done the front. The difficult part is just the unknown and how long it takes to get rid of air bubbles. I lost the banjo bolt for the rear caliper so I moved onto other stuff while I waited for a bolt from overseas before doing the bleed on the rear. | 60 |
| Dropper post | Moderate. I found it challenging to get the cable housing to remain stuck in the post and not fall into the frame. Bike Yoke put out an incredibly helpful video, I just followed this video to a tee. | 30 |
| Bottom bracket | Moderate. 1. Grease BB 2. Left side non-drive side is clockwise to tighten. 3. Right side drive-side (larger BB component) is counter-clockwise to tighten 4. Tighten left then right to both 50Nm using 12-nut torque attachment 5. Install any spacers, mine was stuck on my crank arm on the drive side so I had to pull it off, clean it and re-attach it gently before I put the drive side crank arm on SRAM put out an incredibly helpful video so I just followed this one as well. | 15 |
| Crank arms | Moderate. 1. On the left side crank arm, make sure to turn the preload adjuster in opposite direction of the plus sign all the way until it stops, this puts the adjuster next to the crank arm itself and furthest away from the bottom bracket 2. Grease spindle and splines 3. Insert left side (larger crank arm component with the tube that goes through the BB) 4. Install the crank arm (drive side) which is really just the chainring 5. Use 8mm hex torque to tighten drive side crank arm to 54Nm 6. Use a mallet to drive right side crank arm into BB until it’s fully seated 7. On left side, turn the preload adjuster in the plus direction until all the play stops be careful to not overdo this as it will start to slip on you, just nip it tight enough 8. Use a 2mm hex screw to tighten the bolt until the adjuster edges touch DO NOT OVERTIGHTEN THIS BOLT. Seriously, just remove the gap and that’s it. Don’t over-tighten, it’s a thin plastic piece that will break. SRAM’s BB helpful video also showed crank arms so I just followed it. | 15 |
| Pedals | Moderate. Tighten to max of 54Nm unless the pedal says otherwise (whichever is less). Remember to tighten towards the top to the front of the bike. | 10 |
| SRAM CODE RSC bleed edge (caliper) bleed | Moderate. Additional steps at bottom of this page. I got the part and moved onto the rear brakes. This took me longer than the front because there was more cable length which meant more air and bubbles to expel. Also, the plungers were farther away from each other making it difficult to work with both at the same time. | 120 |
| Chain guide | Moderate. I learned I could put this on even having put the BB and crank arms on thankfully! | 10 |
| Derailleur | Easy. Put on the rear derailleur and hanger and tighten to 25 Nm. | 10 |
| Wheels | Moderate. 1. Install cassette on rear wheel and tighten to 40Nm (for XG-1299). Grease is critical to prevent the cassette from seizing onto the driver body. 2. Put on rotors and clean them with isopropyl alcohol. Install the rotor with the new, threadlock prepped rotor bolts. Tighten the rotor bolts one turn in an alternating sequence until a torque of 6.2 Nm is achieved for each bolt. – HS2 rear rotor (RT-HS-2-A1). – centerline front rotor (MODEL ID: RT-CLN-A1) 3. Loosen the caliper bolts, install wheels and center them in the caliper and tighten them down (9.8-11.8Nm) once all centered. | 30 |
| Chain | Easy. Install chain after putting on STFU guards. I counted 58 links (57 individual links + the special magic link). | 10 |
| Bed in brake pads | Easy. If you put on new pads and rotors, be sure to bed them in for optimal results. Remain seated and do not lock up the wheels at any point during the bed-in procedure. 1. Accelerate the bike to a moderate speed, then firmly apply the brakes until you are at walking speed. Repeat approximately 20 times. 2. Accelerate the bike to a faster speed, then very firmly apply the brakes until you are at walking speed. Repeat approximately 10 times. 3. Allow the brakes to cool prior to any additional riding. 4. After bed-in, the caliper may need to be re-centered. | 60 |
SRAM CODE RSC hydraulic cable line install
| # | Notes | Stock image |
| 1 | Run hydraulic cables through frame housing | n/a |
| 2 | Screw in banjo bolt to brake calipers – Visually inspect the banjo bolt hole to confirm the o-ring is not pinched or protruding. If the o-ring is visible, then remove the bolt and reinstall. Pinched o-rings may cause leaks. – Tighten banjo using T25 to 4.4-5.4Nm | n/a |
| 3 | Measure and cut the hydraulic cables to the right length | n/a |
| 4 | Add in the lever housing to the front of the hydraulic cable followed by the lever nut, you want these in place before you put on the olive and barb. The olive will screw onto the barb looking like the photo to the right. | 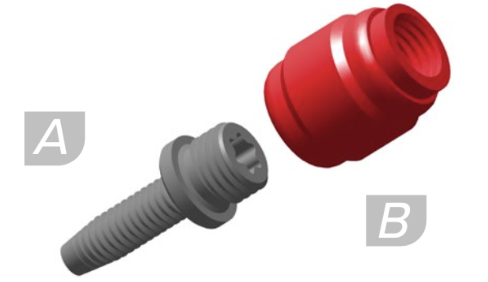 |
| 5 | Install the barb into the end of the line – Apply SRAM DOT hydraulic disc brake assembly grease to the hose barb threads. – Use a T8 TORX wrench to thread the the barb into the hose until it is flush with the end of the hose | 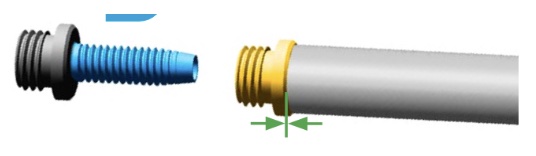 |
| 6 | Install the olive fitting on the end of the line and barb – Thread the compression fitting over the hose barb, counter-clockwise, until it is flush or slightly lower than the hose barb. – Apply SRAM DOT hydraulic disc brake assembly grease to the compression fitting and compression nut threads. | 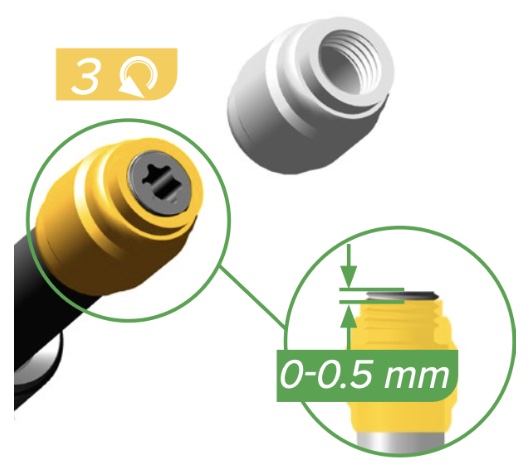 |
| 7 | Install the hose firmly into the lever body while threading the compression nut by hand (make sure you put SRAM DOT on the nut threads). Use an 8 mm flare nut wrench to tighten the compression nut. | 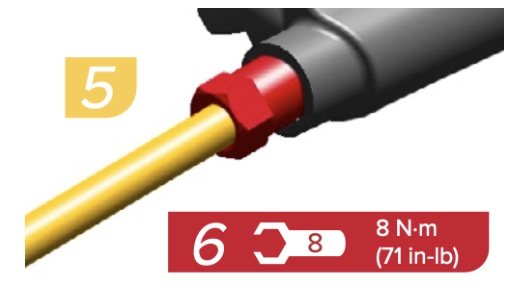 |
| 8 | Slide on the end cap | 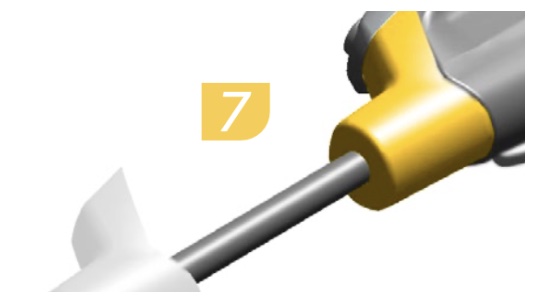 |
SRAM CODE RSC bleed edge (caliper) bleed service
| # | Notes | Stock image |
| 1 | To assemble a syringe for the brake lever, thread the bleed clamp assembly with a threaded bleed fitting onto one of the syringe plungers. It may come assembled already. – Fill the syringe for the brake lever with DOT 4 or 5.1 brake fluid until it is about 3/4 full. – Hold the syringe upright, cover the tip with a shop towel, and depress the plunger just enough to remove any air bubbles. The syringe should still be close to 3/4 full. – 6:05 of video – Once the air bubbles are gone, close the clamp! | 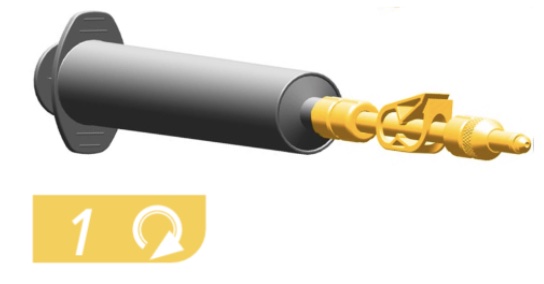 |
| 2 | To assemble a syringe for the brake caliper, thread the Bleeding Edge tool assembly onto one of the syringe plungers. It may come assembled already. – Fill the syringe for the brake caliper with a small amount of DOT brake fluid. – Hold the syringe upright, cover the tip with a shop towel, and depress the plunger just enough to remove any air bubbles. – Leave the clamp open you are about to install it on the caliper | 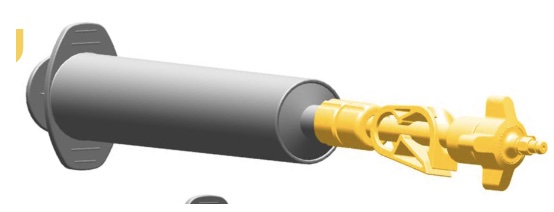 |
| 3 | CALIPER Install the bleeding edge syringe on the caliper – 8:54 of video – Remove the bleed port plug – Use a 4 mm hex wrench to loosen the bleed port valve 1/4 turn, then gently retighten the bleed port. Some oil may come out so be prepared for that and clean it up. – Install the syringe with the Bleeding Edge tool attachment into the bleed port. Push it into the bleed port until you hear and feel it click in place. – Rotate the Bleeding Edge tool attachment counter-clockwise (CC) one complete rotation to open the system. Do not exceed two complete rotations. | 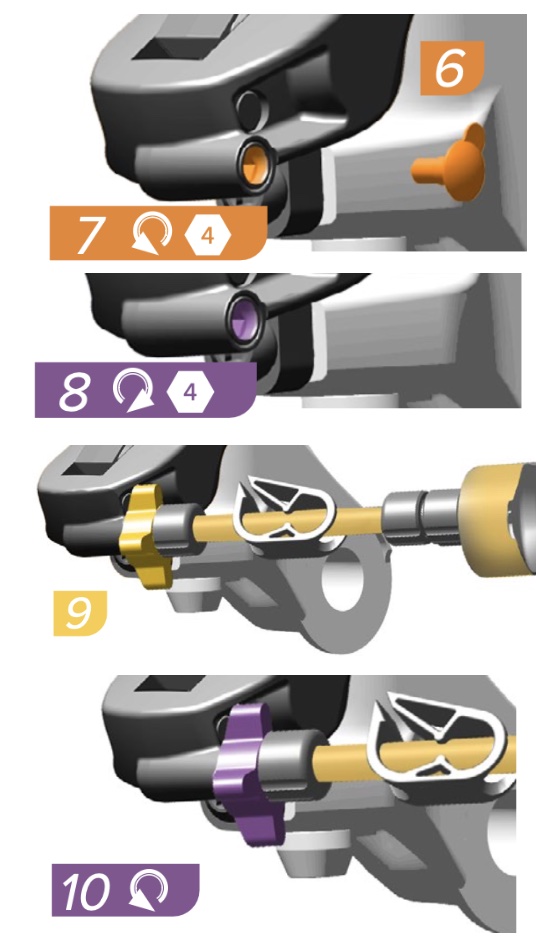 |
| 4 | LEVER Rotate the Contact Point Adjustment dial in the opposite direction of the arrow until it stops. 1. – 6:59 of video. | 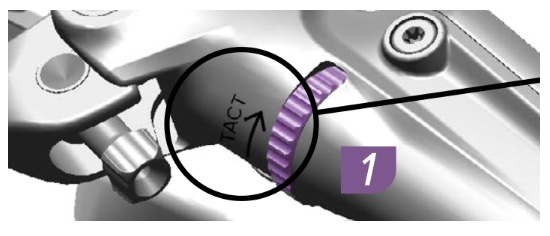 |
| 5 | LEVER Rotate the lever Reach Adjust knob, or hex adjuster, until the lever blade is 75-80 mm from the centerline of the handlebar. | 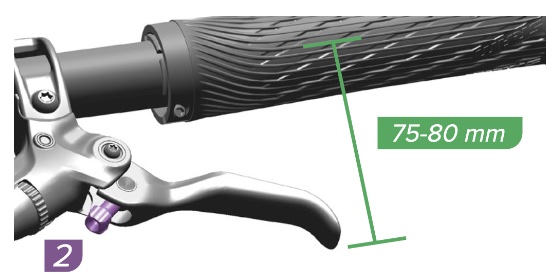 |
| 6 | LEVER Use a T10 TORX to remove the bleed screw from the lever. Fluid will drip out of the bleed port so clean it up. – Put a rag on the handlebar around the lever so it catches any drips | 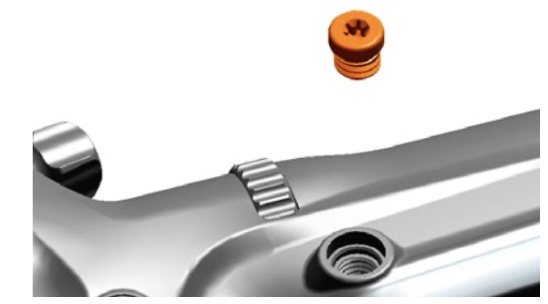 |
| 7 | LEVER Thread the 3/4 full syringe into the lever bleed port. | 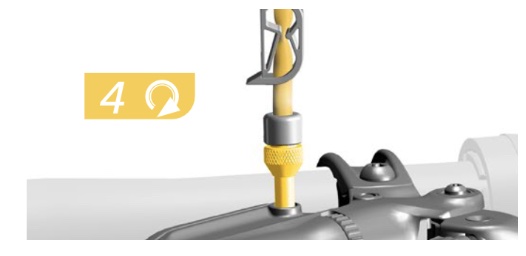 |
| 8 | Bleeding note: Do not pull the brake fluid into the caliper with the caliper syringe. Excessive fluid pressure can cause the Bleeding Edge syringe tool to dislodge from the caliper. Use the lever syringe to move fluid through the system. LEVER Step 1: Open the clamp on the syringe at the lever. Make sure the clamp at the bleeding edge is open. Hold the syringe vertically. Gently push the plunger down, stopping before air enters the hose tube. Fluid will fill the syringe at the brake caliper. – 10:12 of video – For well worn brake fluid, if the fluid in the syringe at the caliper is discolored, continue to push all the fluid out of the system. Restart the bleed procedure with new fluid in both syringes. | 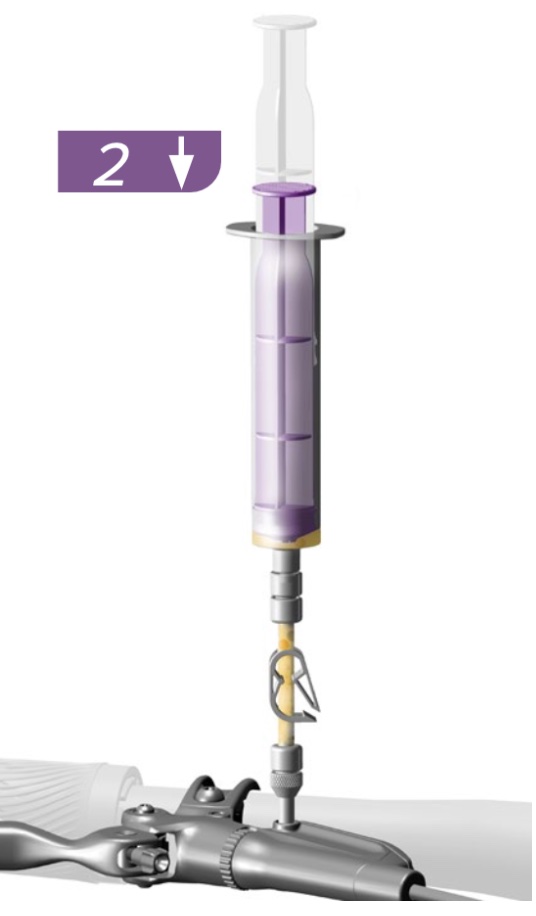 |
| 9 | CALIPER and LEVER Step 2: Hold the syringe at the caliper vertically while slowly pulling the syringe plunger at the lever upward to draw fluid from the syringe at the caliper. – Stop before any air enters the hose tube at the caliper. – If needed: repeat Steps 1 and 2 until only a small amount of bubbles appear. | 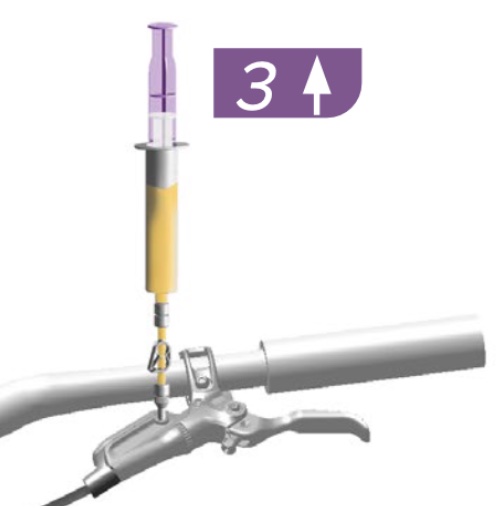 |
| 10 | CALIPER Rotate the Bleeding Edge tool attachment clockwise (C) until it stops to close the system. | 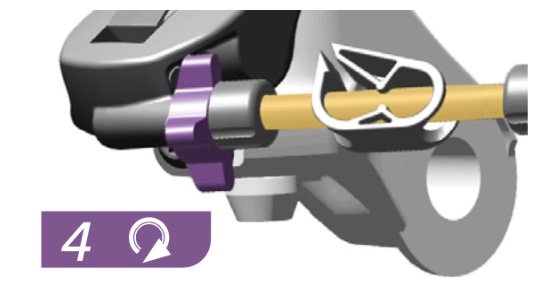 |
| 11 | CALIPER Remove the syringe with the Bleeding Edge tool attachment from the bleed port by pulling the Bleeding Edge tool straight from the caliper. – Do not rotate the Bleeding Edge tool while removing. | 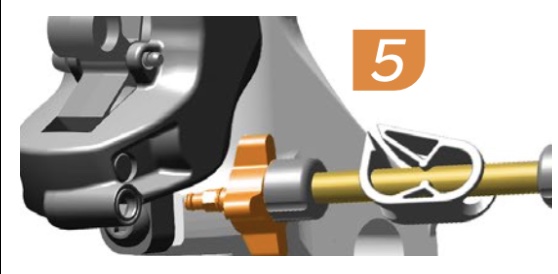 |
| 12 | CALIPER Use a 4 mm hex wrench to tighten the bleed port to 1.6 N·m (14 in-lb). – Install the bleed plug. | 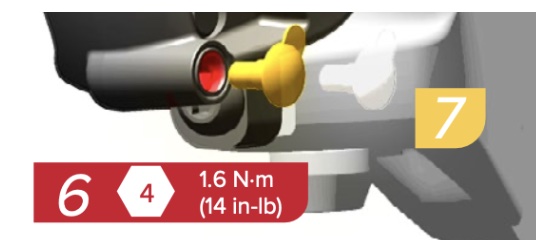 |
| 13 | LEVER Squeeze and release the lever blade. | 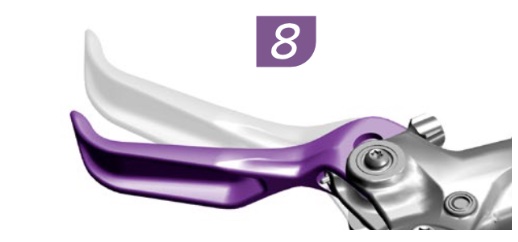 |
| 14 | Hold the syringe at the lever vertically. Firmly pull on the plunger to create a vacuum, then compress the plunger to pressurize the system. Repeat this process several times or until only a small amount of bubbles exit the system. | 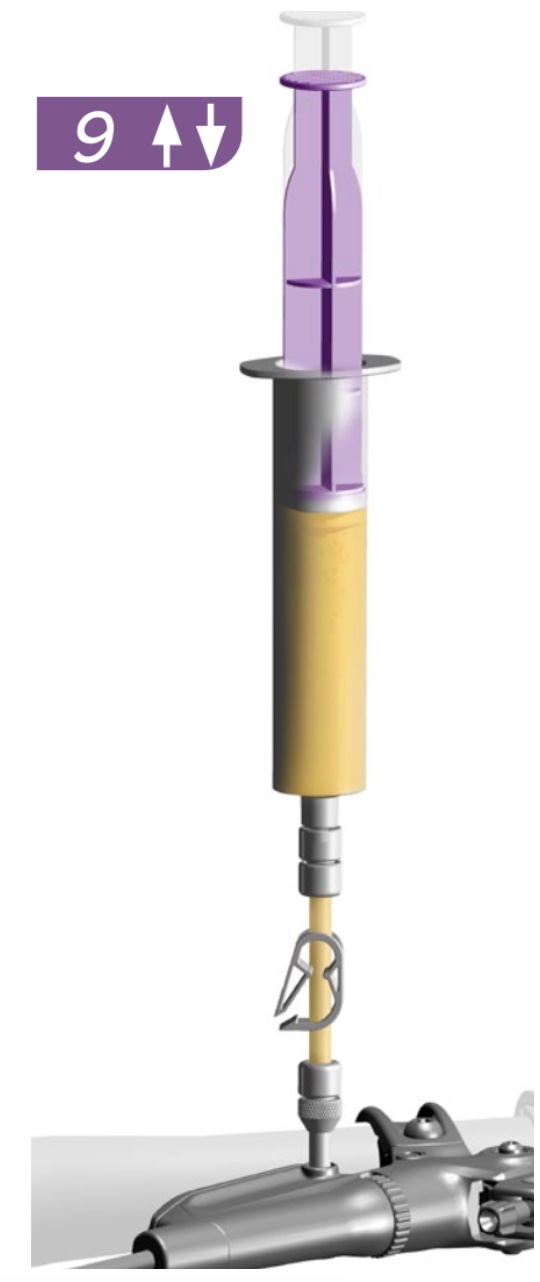 |
| 15 | Lightly compress and release the plunger at the lever to equalize the system. | 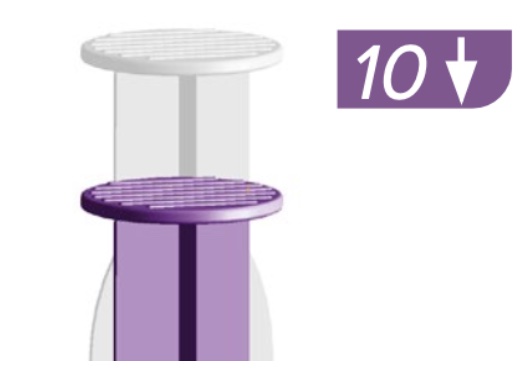 |
| 16 | Close the clamp on the syringe at the brake lever. | 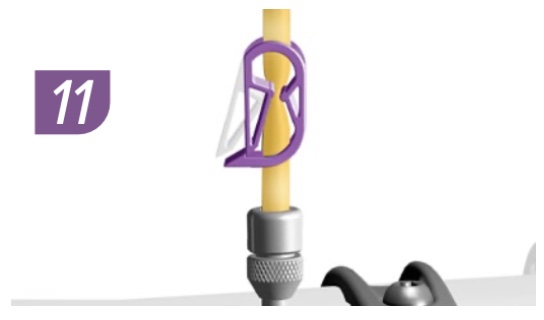 |
| 17 | Remove the syringe at the lever from the bleed port. Clean any DOT brake fluid that drips from the bleed port with a shop towel. | 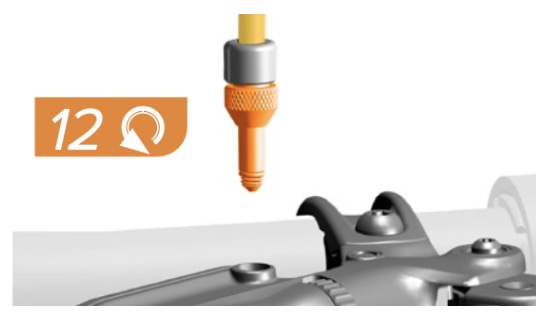 |
| 18 | Install the bleed screw. Use a T10 TORX to tighten the bleed screw to 1.6 N·m (14 in-lb). Clean any DOT brake fluid that drips from the bleed port with a shop towel. | 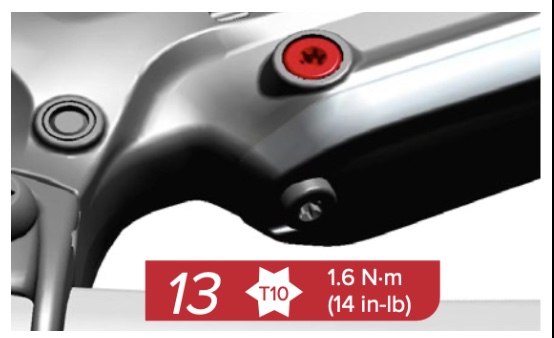 |
| 19 | Insert brake pads after removing the pad spacer/block. | 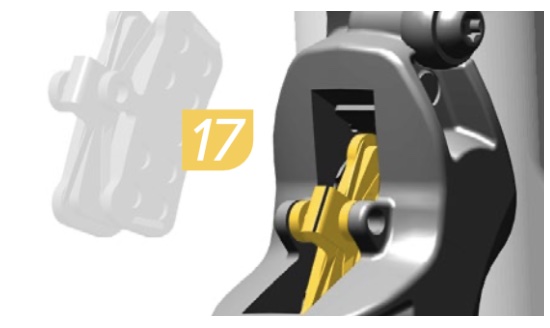 |
| 20 | Install brake pads and pin (1.1Nm). | 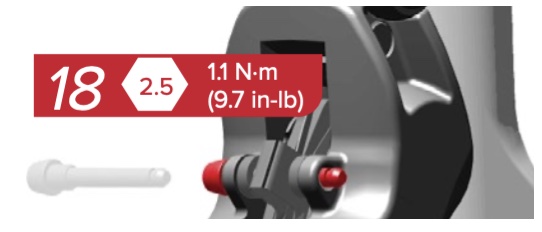 |
| 21 | Put the pin clip. The safety clip sits all the way down so push it until it can’t clip further down on the pin. | 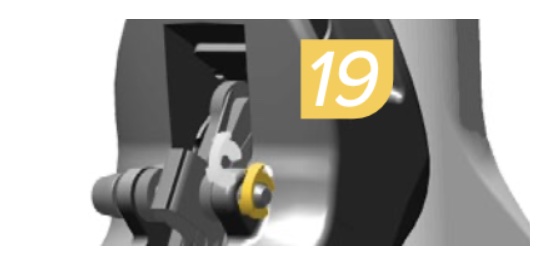 |
| 22 | You can put in the pad spacer now and squeeze the brake calipers making sure the pistons are firing. You should be all set for the rotors now. |
